
Oak Bookcase
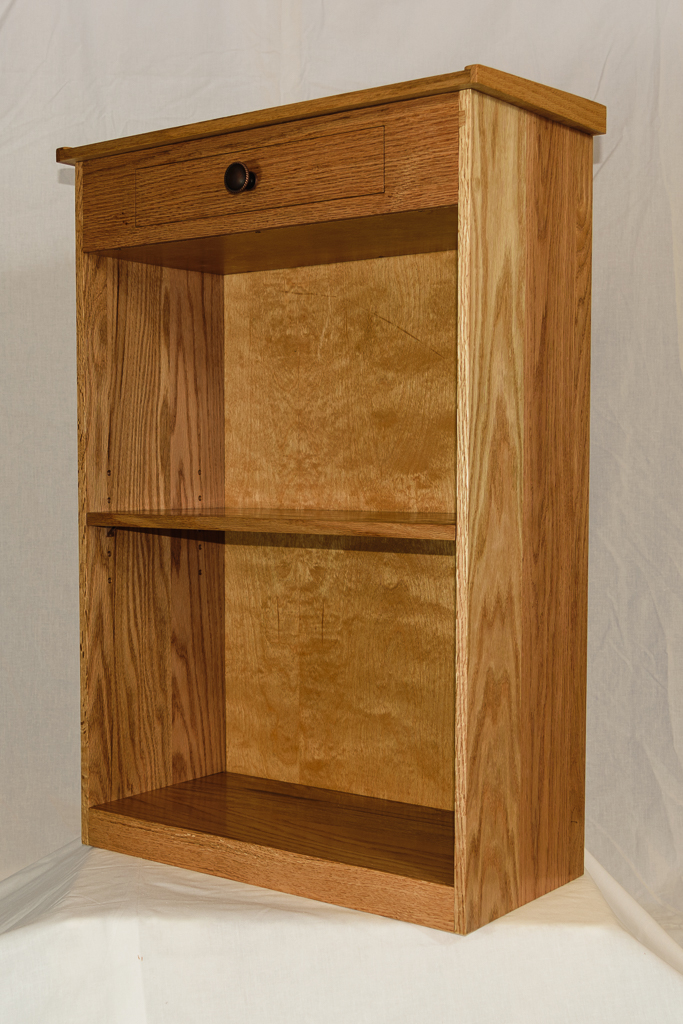
This bookcase was made for a friend who took a lot of time and effort to teach me to sing. She had a small, white-painted particle board bookcase in her kitchen for cookbooks. It was too small, didn't match her decor, and just did not meet her needs.
I had a supply of red oak flooring that had been removed from another friends home (foundation repairs!) and this material planes down to a little over 1/2", making it ideal for making a replacement bookcase. Her existing cabinets are oak with a golden oak varnish finish, so making a new bookcase to match the existing kitchen became straight forward.
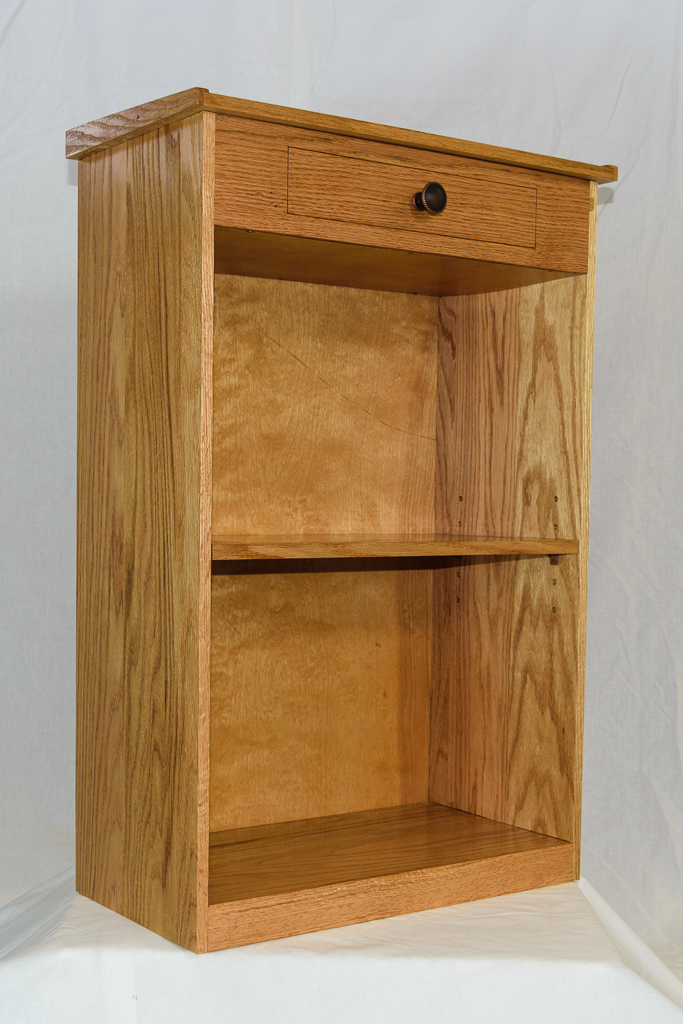
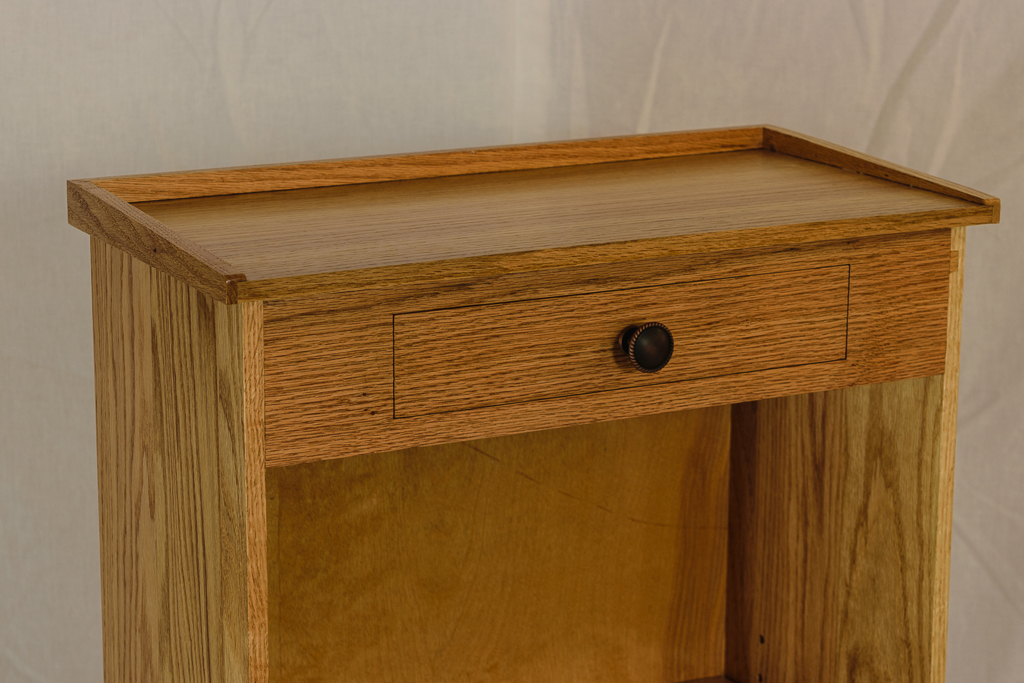
The old case she was using had a short shelf at the top, and she had fashioned a small cardboard box there, in lieu of a drawer. I designed the new case with a drawer on top, and since it was still a fairly small unit. I did not want anything too cumbersome. I opted to try a simple technique that I had seen but never had a chance to use. The drawer front is cut out of the top apron so that the grain across the apron and draw are continuous with no obvious breaks. The trick is to cut the apron oversize by twice the saw kerf and ripping it above and below the drawer location - this leave a larger center portion with the drawer front and two narrow pieces that fit above and below the drawer. The drawer front is then cross cut from the middle of the larger section and the two end scrapes are glued back into place between the smaller upper and lower pieces. A couple of passes with a hand plan reduce the width of the drawer front to fit easily into the space provided for it.
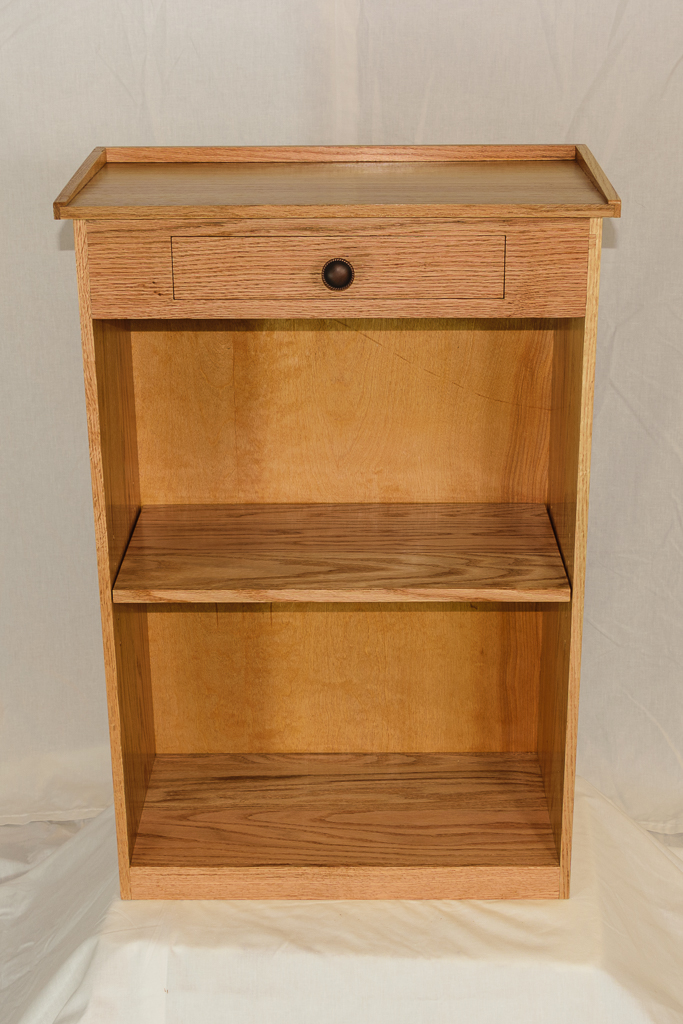
The center shelf of the unit was positioned with the usual plastic shelf pins, and a series of 5 holes were drilled to give a 5 inch adjustment range for that shelf. The movable shelf also has a small front face added, set into a rabbet, to provide a little more stiffness in the shelf.
All of the structural members were assembled with mortise and tenon joints cut with the Leigh FMT. The top aprons were cut with double tenons, although in retrospect that was probably not necessary and complicated the assembly a little bit. But it was a chance to learn about double tenons using the Leigh jig.
The back and area under the drawer were covered with 1/8" maple plywood, which was also used for the drawer bottom. Both the back and the panel under the drawer were set into 1/8" deep rabbets on the back on on the apron pieces.

and shelf pins
The top needed something more than just a flat surface, and a small edge to keep things from rolling off seemed a good way to finish it and to cover the exposed end grain as well. Getting the proper tapering on both side pieces was problematic, primarily due to the small size of the parts. The solution was to use double sided tape to tape them together and use the jointer to taper them at the same time. Light sanding then eased the transition into the taper and rounded the front corner.
Finishing was done with polyurethane varnished thinned and wiped on. The maple ply faces were stained to better match the oak color and then varnished as well.